Android : Keystore 정보확인 및 패스워드 변경

1. 안드로이드 앱 배포시 필요한 키스토어 파일의 정보를 확인하는 방법.

keytool -list -v -keystore [파일명]

2.  패스워드 변경

<span class="s1">keytool -storepasswd -keystore [파일명]

3. Alias 패스워드 변경

keytool -keypasswd -keystore [파일명] -alias [Alias명]

키스토어 파일을 잃어버리면 더이상 앱을 업데이트할 수 없으니 반드시 백업을 하고 관리합시다.

CentOS 7 : Nginx + PHP7 + MariaDB 설치 #4

CentOS 7 : Nginx + PHP7 + MariaDB 설치 #1
CentOS 7 : Nginx + PHP7 + MariaDB 설치 #2
CentOS 7 : Nginx + PHP7 + MariaDB 설치 #3
CentOS 7 : Nginx + PHP7 + MariaDB 설치 #4

4. phpMyAdmin 설치

Nginx 와 PHP 7, MariaDB 를 설치해 보았다. phpMyAdmin 을 설치하여 올바르게 설치되었는지 확인해보자.
phpMyAdmin 설치는 업데이트 관리를 위하여 git 으로 설치하자. 이제 git은 개발자에게 필수적인 툴이 되었다.

yum install git

phpMyAdmin 을 git 으로 설치한다. phpMyAdmin은 stable 버전의 branch 관리를 별도로 하고 있다. branch 설정을 따로 하지 않으면 stable 버전이 아닌 개발 버전이 설치된다.

git clone --branch=STABLE git://github.com/phpmyadmin/phpmyadmin.git phpmyadmin

phpmyadmin 폴더가 생성되며 소스가 다운로드 된다. 이 phpmyadmin 폴더가 설치 폴더가 된다.

기본 환경 설정 파일을 복사하고 설정하자.

cd phpmyadmin
cp config.sample.inc.php config.inc.php

Nginx 에 phpMyAdmin 사이트 설정을 추가한다.

vi /etc/nginx/conf.d/phpmyadmin.conf
# phpMyAdmin - https://www.phpmyadmin.net/
# updated: 2016-04-04
server {
# PHP 7.0 설정을 위한 변수 설정 FastCGI 설정에서 사용한다.
set $APP_BACKEND php70_backend;

listen 80;
server_name [서버 도메인];
root [phpMyAdmin 설치 폴더];

access_log /var/log/nginx/phpmyadmin.access.log main;
error_log /var/log/nginx/phpmyadmin.error.log;

# 업로드시 파일+내용 최대 크기. php.ini 의 post_max_size 값과 동일하게 설정.
client_max_body_size 30m;

index index.php index.html index.htm;

# 브라우저에 캐싱을 위해, 리소스 만료일 지정
location ~* \.(js|css|png|jpg|jpeg|gif|ico|svg|wav|swf|eot|ttf|otf|woff|woff2|flv|mp3|mp4|xml)$ {
access_log off;
log_not_found off;
expires max;
}

# 전역 설정 파일
include /etc/nginx/deny.conf;
# FastCGI 설정 파일
include /etc/nginx/fastcgi_php.conf;
}

Nginx 설정 파일이 올바르게 작성되었는지 다시 한번 체크하고 설정을 적용한다.

nginx -t
systemctl reload nginx

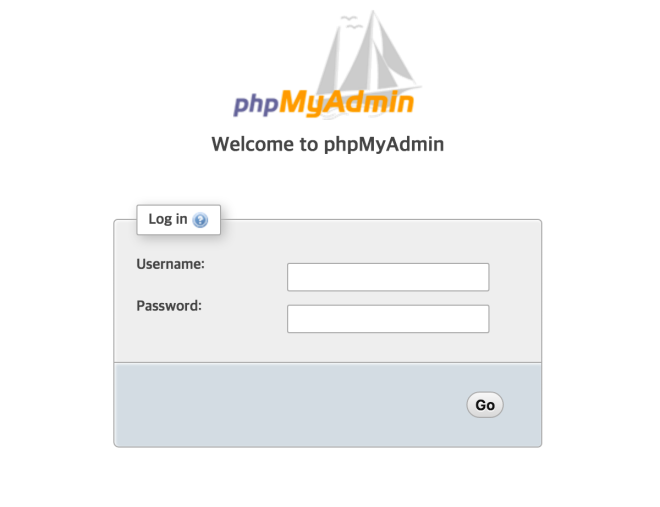
이제 설정 파일에 지정한 도메인으로 접속해서 아래와 같은 화면이 나오는지 확인해보자.

스크린샷 2016-04-22 오후 3.05.49

마치며

본 문서에서는 CentOS 7.0 버전에서 Nginx, PHP 7, MariaDB 를 연동하여 설치하는 방법을 알아보았다.
기존의 Apache, PHP 5, MySQL을 업그레이드한 서비스를 구성해보자.

끝…

참조 문서
http://nginx.org/en/linux_packages.html
https://downloads.mariadb.org/mariadb/repositories/#mirror=kaist&distro=CentOS&distro_release=centos7-amd64–centos7&version=10.1
http://zetawiki.com/wiki/YUM_remi_%EC%A0%80%EC%9E%A5%EC%86%8C_%EC%B6%94%EA%B0%80
https://github.com/php79/stack

CentOS 7 : Nginx + PHP7 + MariaDB 설치 #3

CentOS 7 : Nginx + PHP7 + MariaDB 설치 #1
CentOS 7 : Nginx + PHP7 + MariaDB 설치 #2
CentOS 7 : Nginx + PHP7 + MariaDB 설치 #3
CentOS 7 : Nginx + PHP7 + MariaDB 설치 #4

이전 글에 이어서 MariaDB 설치에 대해 알아보자.

3. MariaDB 설치

MariaDB 저장소를 추가한다.

vi /etc/yum.repos.d/mariadb.repo
[mariadb]
name=MariaDB
baseurl=http://yum.mariadb.org/10.1/centos7-amd64
gpgkey=https://yum.mariadb.org/RPM-GPG-KEY-MariaDB
gpgcheck=1
enable=1

저장소를 추가하고 아래와 같이 설치한다.

yum update
yum install MariaDB-server MariaDB-client MariaDB-compat

가용 메모리에 따라 환경 설정 파일을 복사한다.

– 메모리 4G

cp -av /usr/share/mysql/my-innodb-heavy-4G.cnf /etc/my.cnf.d/

– 메모리 2G

cp -av /usr/share/mysql/my-huge.cnf /etc/my.cnf.d/

– 메모리 512M

cp -av /usr/share/mysql/my-large.cnf /etc/my.cnf.d/

전역 설정 파일을 아래와 같이 추가한다.

vi /etc/my.cnf.d/z-server.conf
[client]
default-character-set=utf8mb4
[mysql]
default-character-set=utf8mb4
[mysqld]
collation-server = utf8mb4_unicode_ci
#init-connect='SET NAMES utf8mb4'
character-set-server = utf8mb4
max_allowed_packet = 32M
slow_query_log
long_query_time = 2
[mysqldump]
default-character-set=utf8mb4
max_allowed_packet = 32M

MariaDB 를 부팅시 시작으로 설정하고 서비스를 시작한다.

systemctl enable mariadb
systemctl start mariadb

root 패스워드 설정 및 보안 설정을 위하여 아래 명령을 실행한다.

mysql_secure_installation
NOTE: RUNNING ALL PARTS OF THIS SCRIPT IS RECOMMENDED FOR ALL MySQL
SERVERS IN PRODUCTION USE! PLEASE READ EACH STEP CAREFULLY!

In order to log into MySQL to secure it, we’ll need the current
password for the root user. If you’ve just installed MySQL, and
you haven’t set the root password yet, the password will be blank,
so you should just press enter here.

Enter current password for root (enter for none): ## 처음 설치시 설정되어 있지 않으므로 엔터를 입력한다.
OK, successfully used password, moving on…

Setting the root password ensures that nobody can log into the MySQL
root user without the proper authorisation.

Set root password? [Y/n] ## root 패스워드를 설정 할 것인지 물어본다.
… skipping.

By default, a MySQL installation has an anonymous user, allowing anyone
to log into MySQL without having to have a user account created for
them. This is intended only for testing, and to make the installation
go a bit smoother. You should remove them before moving into a
production environment.

Remove anonymous users? [Y/n] ## anonymous 유저를 삭제 할것인지 물어본다.
… skipping.

Normally, root should only be allowed to connect from ‘localhost’. This
ensures that someone cannot guess at the root password from the network.

Disallow root login remotely? [Y/n] ## root의 원격 접속을 허용할 것인지 물어본다.
… skipping.

By default, MySQL comes with a database named ‘test’ that anyone can
access. This is also intended only for testing, and should be removed
before moving into a production environment.

Remove test database and access to it? [Y/n] ## test 데이터베이스를 삭제 할것인지 물어본다.
… skipping.

Reloading the privilege tables will ensure that all changes made so far
will take effect immediately.

Reload privilege tables now? [Y/n] ## privileges 테이블을 재 시작 할 것인지 물어본다.
… skipping.

Cleaning up…

All done! If you’ve completed all of the above steps, your MySQL
installation should now be secure.

Thanks for using MySQL!

지금까지 Nginx 와 PHP 7, MariaDB 를 설치해 보았다.
다음 문서에서는 이를 활용하여 phpMyAdmin 을 설치해 보자.

CentOS 7 : Nginx + PHP7 + MariaDB 설치 #2

CentOS 7 : Nginx + PHP7 + MariaDB 설치 #1
CentOS 7 : Nginx + PHP7 + MariaDB 설치 #2
CentOS 7 : Nginx + PHP7 + MariaDB 설치 #3
CentOS 7 : Nginx + PHP7 + MariaDB 설치 #4

이전 글에 이어서 CentOS 7 에서 PHP 7.0 설치를 알아보자.

2. PHP7 설치

remi 저장소를 추가한다.

yum install http://rpms.remirepo.net/enterprise/remi-release-7.rpm

remi-release는 epel-release에 의존성이 있다. epel-release 가 설치되어 있겠지만 확인 해보자.
# rpm -qa | grep remi-release

활성화를 위하여 remi.repo, remi-php70.repo 파일을 수정하거나 php70 설치시 –enablerepo 로 remi 저장소를 활성화해야 한다.

vi /etc/yum.repo.d/remi.repo
[remi]
...
enabled=0 &amp;amp;lt;= 이 부분을 1로 수정한다.
...

# vi /etc/yum.repo.d/remi-php70.repo
[remi-php70]
...
enabled=0 &amp;amp;lt;= 이 부분을 1로 수정한다.
...

저장소가 추가 되었으면 php 및 주로 사용하는 모듈을 설치한다.

yum install php70-php-cli php70-php-fpm php70-php-mysqlnd php70-php-mbstring php70-php-opcache php70-php-xml php70-php-gd php70-php-pecl-zip

전역 설정 파일을 아래와 같이 생성한다.

vi /etc/opt/remi/php70/php.d/z-php.ini
[PHP]
date.timezone = Asia/Seoul
expose_php = Off
; 레거시 코드에 &amp;amp;lt;? 사용된 코드가 많으므로, 소스 노출 예방 차원에서 활성화
;short_open_tag = On
; 에러 로그를 syslog(/var/log/messages) 에 남기기
error_log = syslog
; 에러를 화면에 보여주기. 개발서버이거나 레거시 코드라 별도 에러 처리가 불가할 경우 On
;display_errors = On
;display_startup_errors = On
; 에러 출력 레벨.
;error_reporting = E_ALL &amp;amp;amp; ~E_DEPRECATED &amp;amp;amp; ~E_STRICT ; 기본값. 강력한 에러 확인!
;error_reporting = E_ALL &amp;amp;amp; ~E_DEPRECATED &amp;amp;amp; ~E_NOTICE ; 레거시 호환용. 선언되지 않은 변수 사용시 에러 등 숨김.

[Upload]
upload_max_filesize = 20M
post_max_size = 30M

[OPcache]
; 최대 메모리 사용량. 기본값은 128MB 이며 사이트나 패키지가 많을 때 적절히 늘려주어야 함. 단, 서버 메모리가 충분한 경우에 한함
;opcache.memory_consumption=128
; 최대 캐싱 파일수. 기본 4000 개로는 기본 5000개인 라라벨도 힘들기 때문에 1만~10만개 권장.
opcache.max_accelerated_files=100000
; 캐싱된 파일의 수정 여부 확인 주기.
; 기본 2초는 파일 수정 시간이 2초 지나야 해당 파일의 수정여부를 체크한다는 의미입니다.
; 즉, 소스 수정하고 2초 이내에 화면 새로고침해도 수정된 결과가 반영되지 않는다는 의미입니다.
;opcache.revalidate_freq=2 ; 운영용으로 적합. 최적의 성능.
;opcache.revalidate_freq=1 ; 운영하면서 라이브로 수정할 경우 적합.
;opcache.revalidate_freq=0 ; 개발서버일 경우 0초는 필수! 수정하고 즉시 결과 확인 가능.
; PHP CLI (/usr/bin/php) 실행시, OPcache 활성화 여부.
; 반복되는 실행시 속도가 더 느려지거나, 랜덤하게 에러가 발생하는 사례가 있었으므로 미사용 권장.
;opcache.enable_cli=1

Nginx 와 연동을 위하여 소켓 파일 폴더를 생성하고 php-fpm 데몬 설정 파일을 아래와 같이 수정한다.

mkdir /var/run/php-fpm

vi /etc/opt/remi/php70/php-fpm.d/www.conf
...
user = nginx
group = nginx
...
security.limit_extensions = .php
...
listen = /var/run/php-fpm/php-fpm.sock
...

소켓 파일 및 캐쉬, 세션 폴더들의 그룹을 수정한다.

chgrp nginx /var/run/php-fpm/php-fpm.sock
chgrp nginx /var/opt/remi/php70/lib/php/*

php-fpm 데몬을 부팅시 실행으로 설정하고 서비스를 시작한다.

systemctl enable php70-php-fpm
systemctl start php70-php-fpm

터미널 실행을 위해 심볼릭 링크를 추가한다.

ln -sv /usr/bin/php70 /usr/bin/php

Nginx 에 fastcgi 설정을 아래와 같이 추가한다.

vi /etc/nginx/conf.d/1-fastcgi-upstream.conf
# http://nginx.org/en/docs/http/ngx_http_upstream_module.html
upstream php70_backend {
server unix:/var/run/php-fpm/php-fpm.sock;
# server 127.0.0.1:9000;
}

vi /etc/nginx/fastcgi_php.conf
location ~ \.(php)$ {
try_files $uri =404;
fastcgi_pass $APP_BACKEND;
fastcgi_index index.php;
fastcgi_param SCRIPT_FILENAME $document_root$fastcgi_script_name;
include fastcgi_params;
}

Nginx 설정이 올바르게 되어 있는지 테스트 해보고 설정을 재적용 한다.

nginx -t
systemctl reload nginx

다음은 MariaDB 설치에 대해서 알아보자.
CentOS 7 : Nginx + PHP7 + MariaDB 설치 #1

CentOS 7 : Nginx + PHP7 + MariaDB 설치 #1
CentOS 7 : Nginx + PHP7 + MariaDB 설치 #2
CentOS 7 : Nginx + PHP7 + MariaDB 설치 #3
CentOS 7 : Nginx + PHP7 + MariaDB 설치 #4

CentOS 7 버전에서 Nginx 와 PHP 7버전, MariaDB 를 사용하기 위한 가이드 문서이다.
아래와 같은 방법으로 설치시 PHP 버전 별로 서비스가 가능하다.

1. Nginx 설치

nginx 저장소 추가

vi /etc/yum.repos.d/nginx.repo
[nginx]
name=Nginx
baseurl=http://nginx.org/packages/centos/7/$basearch/
gpgcheck=0
enabled=1

저장소를 추가하고 yum 으로 패키지를 설치하자.

yum install nginx

전역 설정을 아래와 같이 추가했다.

vi /etc/nginx/conf.d/0-server.conf
gzip on;
gzip_min_length 1000;
gzip_types text/plain text/css application/json application/javascript application/x-javascript text/xml application/xml application/xml+rss text/javascript;
server_tokens off;
vi /etc/nginx/deny.conf
# 전역 차단 설정
# 접근 제한 - .htaccess 와 버전관리 시스템들
location ~ /(\.ht|\.git|\.svn) {
&amp;amp;nbsp; &amp;amp;nbsp; access_log off;
&amp;amp;nbsp; &amp;amp;nbsp; log_not_found off;
&amp;amp;nbsp; &amp;amp;nbsp; deny all;
}

Nginx를 부팅시 시작으로 설정하고 데몬 서비스를 시작한다.

systemctl enable nginx
systemctl start nginx

systemctl은 CentOS 7 버전에서 서비스를 관리하는 역할을 수행한다.

다음은 PHP 7.0 설치를 알아보자.